jQuery Scroll Path
簡介
jQuery Scroll Path是一個jQuery插件,可以用來自定義想要的軌跡(Path),透過Scroll的方式呈現動態捲動的動畫效果,
實際效果參考範例,目前ScrollPath並沒有特別的應用方向,但筆者我對於ScrollPath的效果認為相當適合運用在軟體使用步驟教學(App tutorial)上相當的合適,如果大家有想到更好的應用方向不吝告知。
它的捲軸效果非常特別,當你一邊向下滾動,網頁的內容就會
ScrollPath運用的原理很簡單,就是在一張紙上(網頁)畫上若干個軌跡點(Pointer),並使用一條路徑(Path)將其串連,畫面會以某個點為中心,我們要做的就是去移動目前的中心點位置,來產生動畫的效果。
Step1 : 加入jquery.scrollpath.js到你的網頁上
Step2 : 取得路徑物件並繪製路徑(Path)
要產生路徑首先必須取得path物件,這個物件使scrollpath插件所定義完成的,所以使用$.fn.scrollPath("getPath")取得,並且你也可以在這裡設定預設的速度值例如滾軸移動速度、旋轉速度。如下
Path物件提供了一些常用的繪製方法(method),m這些方法使用方法與html canvas的lines, arcs十分的相似,如下
這裡強烈建議先閱讀arcs的教學,以便往後處理弧形路徑會更容易的了解。
在這些方法中,options參數傳入值是一個物件,裡面包含些參數
rotate
用來設定移動到這個軌跡點(Pointer)所旋轉的弧度
callback
用來指定一個函式,這個函式會在到達該軌跡點後觸發呼叫
name
用來設定該軌跡點的名稱,以便可以使用scrollTo方法直接做定位。
繪圖範例如下
Step3 : 初始化scrollpath plugin
接著下一個步驟就是初始化ScrollPath這個Plugin,使用jQuery(" container ")方法呼叫scrollPath,container及為要使用scrollPath繪製的區塊,如下
其中,初始化可以設定三個參數
drawPath
若為true表示最後將會把軌跡(Path)繪製到畫面上。
wrapAround
若為true表示捲動到最後一個元素若繼續捲動會回到起始點,也就是循環捲動。
scrollBar
用來設定要不要啟動scrollBar移動軌跡中心的功能。
完成! 經過這三個步驟你就可以使用ScrollPath的完整功能了。
在這邊為了幫助大家更理解ScrollPath使用方法,這邊會直接使用官方的範例為大家說明及解釋。
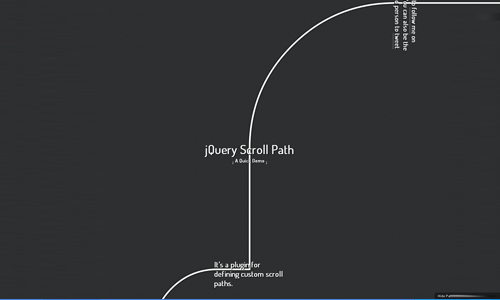
在index.html檔案中,設定了幾個簡易的超連結,分別使用來連結到對應的說明文字上,(html<a href="#title">)中的用法,在相對應的js檔中使用這些title值設定為軌跡點的名稱(name),程式一開始將400,50處設定為起始點位置,接下來繪製直線到400,800的位置並設定該為值為"descript"軌跡點,之後開始繪製了弧形的轉彎並設定軌跡點"syntax",並在該彎後繪製直線到1750,1600並設定軌跡點"scrollbar",以此類推的前進,如下圖

最後程式呼叫$(".wrapper").scrollPath()完成ScrollPath設定及初始化的工作。
ScrollPath是一個非常酷的插件,在動畫效果相當的出色也十分的新穎,ScrollPath作者也希望在未來看到這類的插件能夠實際被運用到各種網站上,如果你正在使用ScrollPath開發網站的功能,那你或許可以聯絡該作者,因為該作者會很樂意地幫你個網站附上連結作為廣告呢!!

Follow Me On Twitter Or Facebook
實際效果參考範例,目前ScrollPath並沒有特別的應用方向,但筆者我對於ScrollPath的效果認為相當適合運用在軟體使用步驟教學(App tutorial)上相當的合適,如果大家有想到更好的應用方向不吝告知。
它的捲軸效果非常特別,當你一邊向下滾動,網頁的內容就會
- 水平滾動
- 斜角滾動
- 360度旋轉
- 由下而上滾動
如何使用
ScrollPath運用的原理很簡單,就是在一張紙上(網頁)畫上若干個軌跡點(Pointer),並使用一條路徑(Path)將其串連,畫面會以某個點為中心,我們要做的就是去移動目前的中心點位置,來產生動畫的效果。
注意 : ScrollPath必須使用在jQuery1.7版本以上
Step1 : 加入jquery.scrollpath.js到你的網頁上
Step2 : 取得路徑物件並繪製路徑(Path)
要產生路徑首先必須取得path物件,這個物件使scrollpath插件所定義完成的,所以使用$.fn.scrollPath("getPath")取得,並且你也可以在這裡設定預設的速度值例如滾軸移動速度、旋轉速度。如下
var path =
$.fn.scrollPath("getPath", {
scrollSpeed: 80,
//
Default is 50
rotationSpeed: Math.PI / 10
//
Default is Math.PI / 15
});
//
Use the various path drawing methods below on the path variable
|
Path物件提供了一些常用的繪製方法(method),m這些方法使用方法與html canvas的lines, arcs十分的相似,如下
moveTo( x, y [,options] )
Moves the center of the screen to a specified coordinate. This is done in a single step (i.e. the screen 'jumps' to the given point).
lineTo( x, y [,options] )
Draws a straight line from the current position to the given point.
arc( centerX, centerY, radius, startAngle, endAngle, counterclockwise [,options] )
Draws an arc with its center at coordinate (centerX, centerY) with the given radius. The start and end angles are in radians, and the counterclockwise boolean decides which direction the path is drawn between the angles. If the starting point of the arc isn't the same as the end point of the preceding path, a straight line is automatically drawn between the points.
rotate( radians [,options])
Rotates the screen around the current position to the given radian angle. These rotations aren't added to the path if the browser doesn't support CSS transforms.
這裡強烈建議先閱讀arcs的教學,以便往後處理弧形路徑會更容易的了解。
在這些方法中,options參數傳入值是一個物件,裡面包含些參數
rotate
用來設定移動到這個軌跡點(Pointer)所旋轉的弧度
callback
用來指定一個函式,這個函式會在到達該軌跡點後觸發呼叫
name
用來設定該軌跡點的名稱,以便可以使用scrollTo方法直接做定位。
繪圖範例如下
path.lineTo(500,500,
{
rotate: 2
* Math.PI,
callback: function() {
alert("You've reached
the end!");
},
name: "myPath"
});
|
Step3 : 初始化scrollpath plugin
接著下一個步驟就是初始化ScrollPath這個Plugin,使用jQuery(" container ")方法呼叫scrollPath,container及為要使用scrollPath繪製的區塊,如下
$(".your-container-element").scrollPath({
drawPath: true,
wrapAround: true,
scrollBar: false
});
|
其中,初始化可以設定三個參數
drawPath
若為true表示最後將會把軌跡(Path)繪製到畫面上。
wrapAround
若為true表示捲動到最後一個元素若繼續捲動會回到起始點,也就是循環捲動。
scrollBar
用來設定要不要啟動scrollBar移動軌跡中心的功能。
完成! 經過這三個步驟你就可以使用ScrollPath的完整功能了。
關於範例檔案
在這邊為了幫助大家更理解ScrollPath使用方法,這邊會直接使用官方的範例為大家說明及解釋。
index.html
<!DOCTYPE html>
<html lang="en">
<head>
<meta http-equiv="Content-Type"
content="text/html;
charset=UTF-8">
<link rel="stylesheet"
type="text/css"
href="style/style.css" />
<link rel="stylesheet"
type="text/css"
href="style/scrollpath.css" />
<link href="http://fonts.googleapis.com/css?family=Terminal+Dosis&subset=latin"
rel="stylesheet"
type="text/css">
<script type="text/javascript"
src="script/lib/prefixfree.min.js"></script>
<meta name="description"
content="The
plugin that lets you define custom scroll paths" />
<title>jQuery
Scroll Path</title>
</head>
<body>
<nav>
<ul>
<li>
<a href="#start">1</a>
</li>
<li>
<a href="#description">2</a>
</li>
<li>
<a href="#syntax">3</a>
</li>
<li>
<a href="#scrollbar">4</a>
</li>
<li>
<a href="#rotations">5</a>
</li>
<li>
<a href="#rotations-rotated">6</a>
</li>
<li>
<a href="#source">7</a>
</li>
<li>
<a href="#follow">8</a>
</li>
</ul>
</nav>
<div class="settings">
<a href=""
class="show-path">Show
Path</a>
</div>
<div class="wrapper">
<div class="demo">
<h1>jQuery
Scroll Path</h1>
<span class="arrow">↓</span>
A Quick Demo <span class="arrow">↓</span>
</div>
<div class="description">
<span class="big">It's
a plugin for defining custom scroll paths.</span>
</div>
<div class="syntax">
<span class="big">It
uses canvas flavored syntax to draw lines and arcs.</span>
</div>
<div class="scrollbar">
<span class="big">It
comes with a custom scrollbar.</span>
</div>
<div class="rotations">
<span class="big">It
also does rotations</span>
<span class="upside-down
big">in <a href="http://caniuse.com/#feat=transforms2d">supported</a>
browsers.</span>
</div>
<div class="source">
<span class="big">It's
available with documentation on <a href="https://github.com/JoelBesada/scrollpath">GitHub</a>.<span>
</div>
<div class="follow">
</div>
</div>
<script type="text/javascript"
src="http://code.jquery.com/jquery-latest.pack.js"></script>
<script type="text/javascript"
src="script/lib/jquery.easing.js"></script>
<script type="text/javascript"
src="script/jquery.scrollpath.js"></script>
<script type="text/javascript"
src="script/demo.js"></script>
</body>
</html>
|
demo.js
function init() {
/* ========== DRAWING THE
PATH AND INITIATING THE PLUGIN ============= */
$.fn.scrollPath("getPath")
// Move to 'start' element
.moveTo(400,
50,
{
name : "start"
})
// Line to 'description'
element
.lineTo(400,
800,
{
name : "description"
})
// Arc down and line to
'syntax'
.arc(200,
1200,
400,
-Math.PI / 2,
Math.PI / 2,
true).lineTo(600,
1600,
{
callback : function() {
highlight($(".settings"));
},
name : "syntax"
})
// Continue line to
'scrollbar'
.lineTo(1750,
1600,
{
callback : function() {
highlight($(".sp-scroll-handle"));
},
name : "scrollbar"
})
// Arc up while rotating
.arc(1800,
1000,
600,
Math.PI / 2,
0,
true,
{
rotate : Math.PI / 2
})
// Line to 'rotations'
.lineTo(2400,
750,
{
name : "rotations"
})
// Rotate in place
.rotate(3
* Math.PI / 2,
{
name : "rotations-rotated"
})
// Continue upwards to
'source'
.lineTo(2400,
-700,
{
name : "source"
})
// Small arc downwards
.arc(2250,
-700,
150,
0,
-Math.PI / 2,
true)
//Line to 'follow'
.lineTo(1350,
-850,
{
name : "follow"
})
// Arc and rotate back to
the beginning.
.arc(1300,
50,
900,
-Math.PI / 2,
-Math.PI, true,
{
rotate : Math.PI * 2,
name : "end"
});
// We're done with the
path, let's initate the plugin on our wrapper element
$(".wrapper").scrollPath({
drawPath : true,
wrapAround : true
});
// Add scrollTo on click
on the navigation anchors
$("nav").find("a").each(function() {
var target = this.getAttribute("href").replace("#",
"");
$(this).click(function(e)
{
e.preventDefault();
// Include the jQuery
easing plugin (http://gsgd.co.uk/sandbox/jquery/easing/)
// for extra easing functions
like the one below
$.fn.scrollPath("scrollTo", target, 1000,
"easeInOutSine");
});
});
/*
===================================================================== */
$(".settings
.show-path").click(function(e) {
e.preventDefault();
$(".sp-canvas").toggle();
}).toggle(function() {
$(this).text("Hide Path");
}, function() {
$(this).text("Show Path");
});
$(".tweet").click(function(e)
{
open(this.href,
"", "width=550, height=450");
e.preventDefault();
});
$.getJSON("http://cdn.api.twitter.com/1/urls/count.json?callback=?&url=http%3A%2F%2Fjoelb.me%2Fscrollpath",
function(data) {
if(data
&& data.count !== undefined) {
$(".follow
.count").html("the " + ordinal(data.count + 1)
+ " kind person to");
}
});
}
|
在index.html檔案中,設定了幾個簡易的超連結,分別使用來連結到對應的說明文字上,(html<a href="#title">)中的用法,在相對應的js檔中使用這些title值設定為軌跡點的名稱(name),程式一開始將400,50處設定為起始點位置,接下來繪製直線到400,800的位置並設定該為值為"descript"軌跡點,之後開始繪製了弧形的轉彎並設定軌跡點"syntax",並在該彎後繪製直線到1750,1600並設定軌跡點"scrollbar",以此類推的前進,如下圖

最後程式呼叫$(".wrapper").scrollPath()完成ScrollPath設定及初始化的工作。
ScrollPath是一個非常酷的插件,在動畫效果相當的出色也十分的新穎,ScrollPath作者也希望在未來看到這類的插件能夠實際被運用到各種網站上,如果你正在使用ScrollPath開發網站的功能,那你或許可以聯絡該作者,因為該作者會很樂意地幫你個網站附上連結作為廣告呢!!
Posts by 奧格士(Augus)
Hi,I my name is Augus. I am a author of this blog.I love blogging and I like to share things which I know.Follow Me On Twitter Or Facebook